Secure DNS in Google Chrome
By default, Chrome uses the DNS servers provided by your ISP. Typically, they lack encryption support, making them insecure. Therefore, there is a risk that a malicious actor could manipulate the response from such a server. Additionally, your provider has the ability to log the websites you visit. To counteract this, the browser offers the option to use secure, third-party DNS services that utilize the DoH protocol.
You just need to go to settings, select one of the servers from the provided list, or enter any custom address.
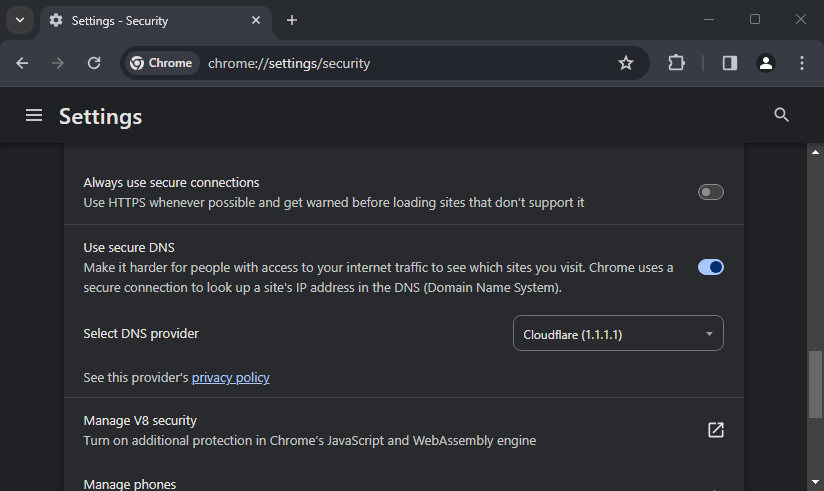
How to turn on secure DNS
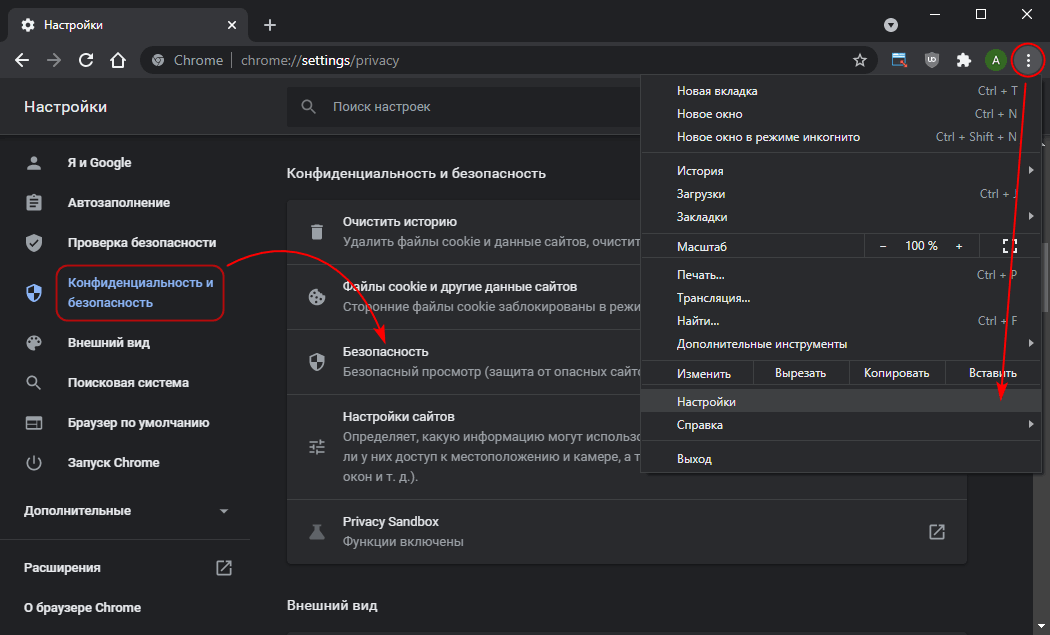
- Navigate to the Chrome settings section called “Security”. You have 2 options to get there:
- quickly through the link chrome://settings/security
- using the menu → “Settings” → top left, select “Privacy and Security” → in the center, choose “Security”
- Scroll down to the “Advanced” section
- Toggle on the switch “Use secure DNS” :
- select any service from the dropdown list as desired, for example, OpenDNS
noticeNow, regardless of the DNS settings configured in Windows, Chrome will specifically query the addresses specified in the browser.
Why Chrome needs DoH
This protocol is quite young and officially started being utilized by leading web browsers in 2018, Chrome included among them. The abbreviation stands for “DNS over HTTPS”, meaning your request to the DNS server will be encrypted, greatly hindering malicious actors from tampering with the response. In simpler terms, it will be much more difficult in this case to redirect you to a fake website and to ascertain which address you intended to visit.
There’s also a similar option – DoT, which operates using TLS.
DNS cache cleaning
Any well-designed program should strive to optimize the processing of network requests whenever possible to enhance user experience. One such mechanism is DNS request caching. Clearing the DNS cache may be necessary primarily for web developers. The algorithm is as follows:
- Navigate to the link chrome://net-internals/#dns and click on the “Clear host cache” button
- Proceed to the sockets section at chrome://net-internals/#sockets and click on “Flush socket pools”
- If you’re not using one of the secure servers, it’s advisable to reset the DNS cache in Windows:
- press the Win+R key combination
- in the opened window, type
cmdand press Enter - in the console, enter the command
ipconfig /flushdnsand press Enter