Passwords in Google Chrome
Chrome, like any modern browser, offers its users the function of storing passwords for quick authentication on websites. Adding data occurs in semi-automatic mode when filling out a registration form. The login and password database is stored locally in a special file, and may also be duplicated in the “cloud” if synchronization is enabled.
Password Manager
Or, to be more precise, Google Password Manager. This is a Chrome module responsible for managing passwords, their verification, and some settings options. We will definitely look at all this in more detail below.
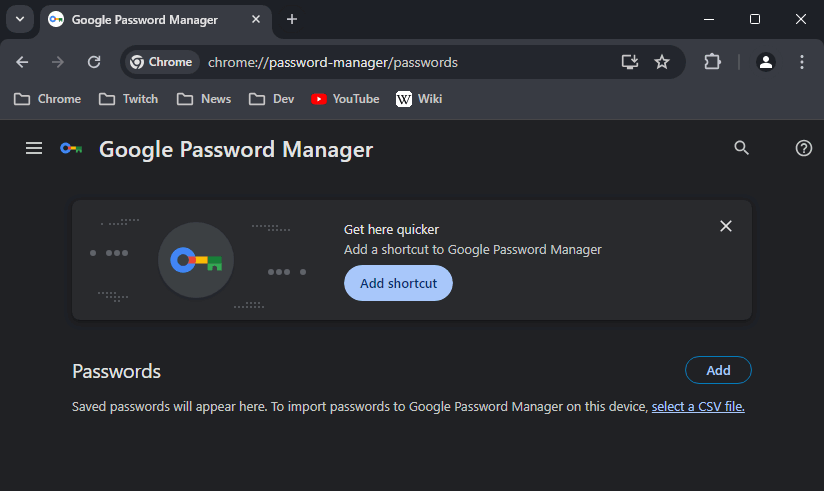
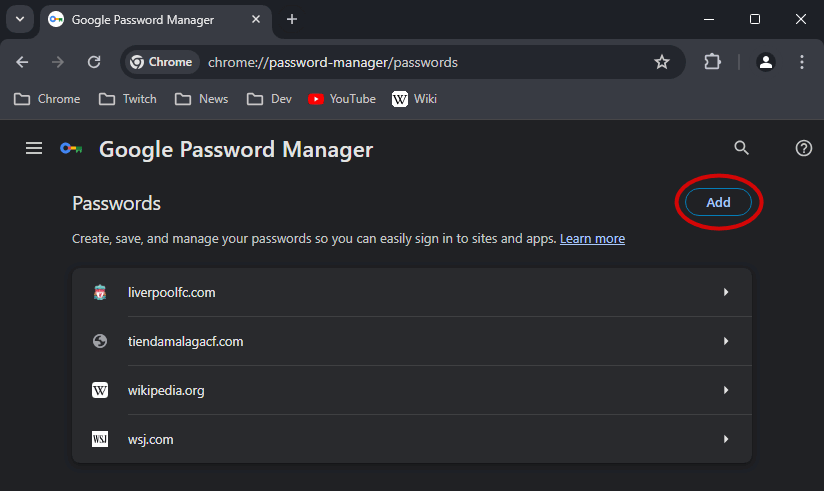
Password List
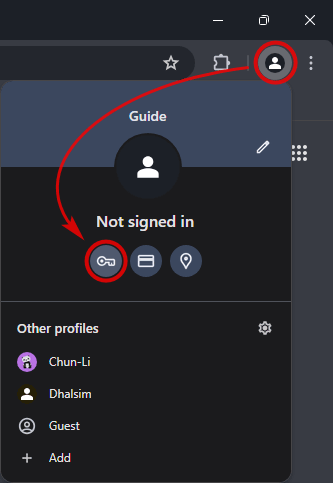
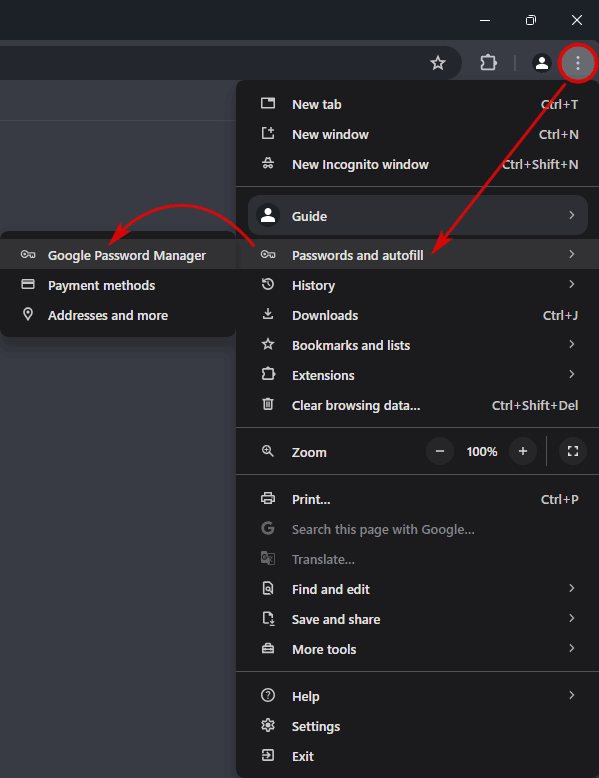
You can open the manager using one of 3 methods:
- the link chrome://settings/passwords
- the icon of the profile in the top right corner of the browser window → click on the button with the key icon
- menu → “Passwords and autofill” → “Google Password Manager”
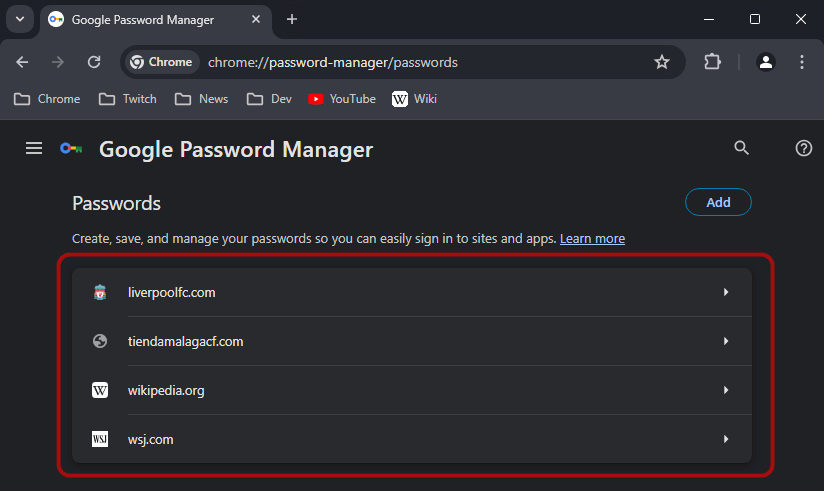
Here you can view the list of all passwords saved in Chrome. For each entry, deletion, editing, and copying operations are available. If a password is set for your Windows user, you will need to enter it to view or change any item in the manager. This is done for security reasons.
importantThe list will also be available at https://passwords.google.com/ if you use synchronization and have selected “Passwords”
Saving a Password
Manually
You can click the “Add” button in the password manager, fill in the form data – website, login, and password. Not the most convenient method…
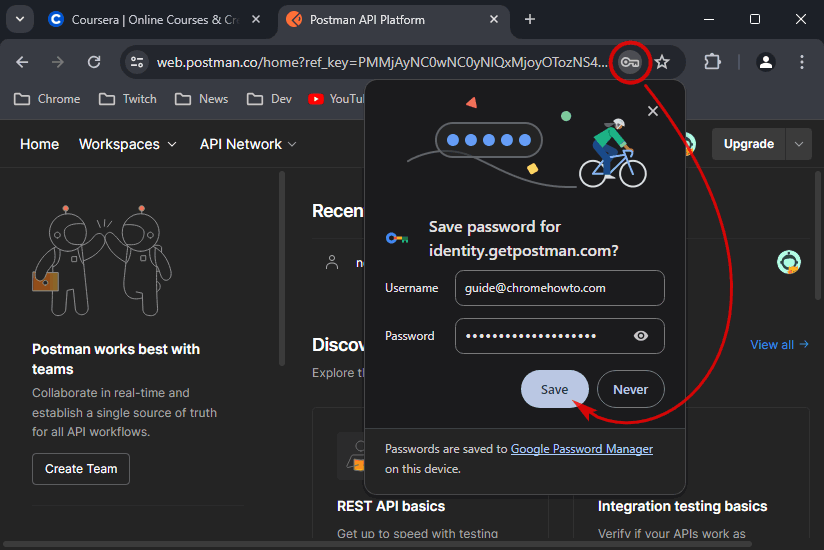
Semi-Automatic Mode
When logging in to any website or filling out a registration form, Chrome will suggest saving your credentials in its database. Assuming the option “offer to save passwords” is not disabled. The process goes like this:
- you open the login form on the website, enter your login and password, and click “Sign In”
- Chrome opens its own form for you, showing the data that will be saved in the password manager
- you just need to click “Save”
Deleting a Password
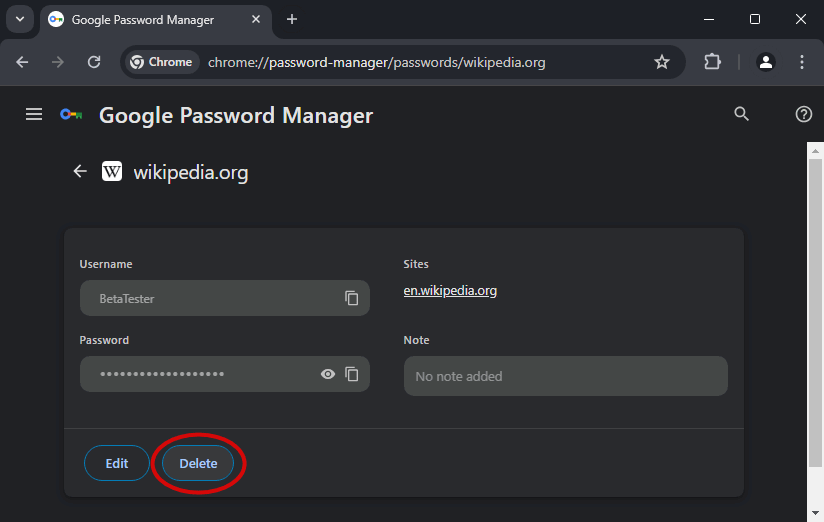
- If you need to delete the password for a specific site:
- open the password manager
- visually find or use the search form at the top right, the desired site
- click on the site name, enter the Windows password if requested
- click the “Delete” button
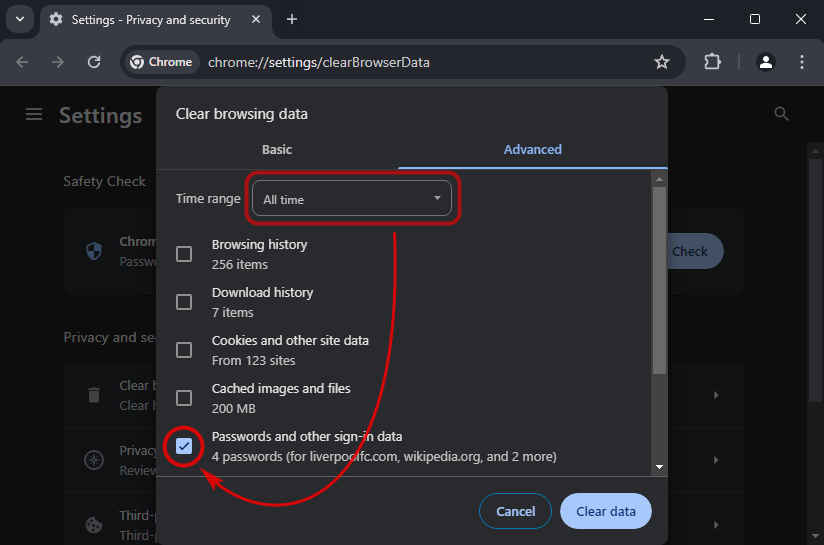
- If you want to delete all saved passwords in Chrome:
- launch the universal clearing module
- select “All time” from the “Time range” dropdown list
- go to the “Advanced” tab, leave only the “Passwords and other sign-in data” option
- click “Clear data” at the bottom right
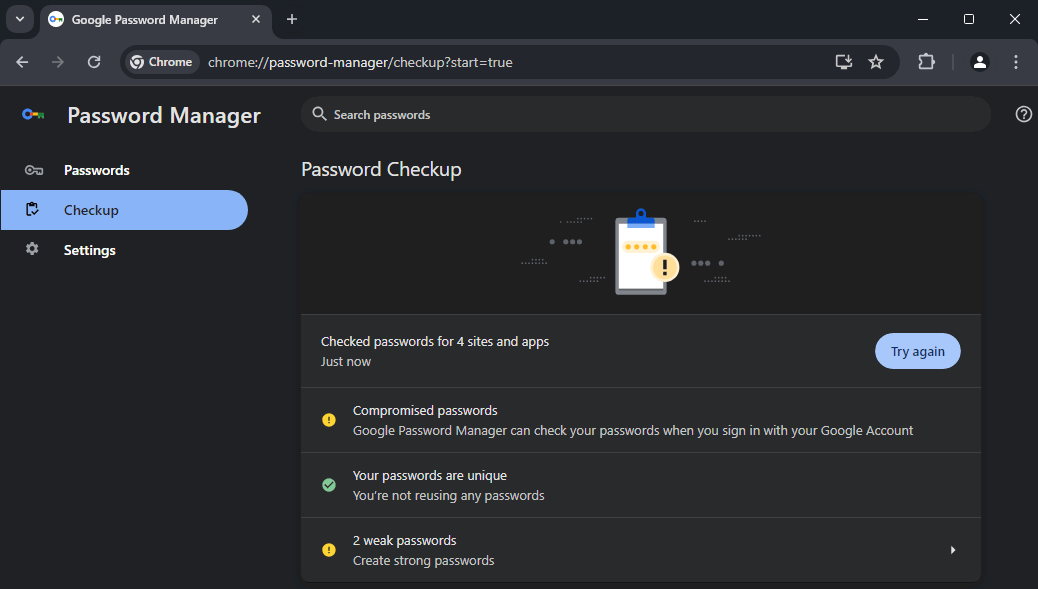
Check passwords
In a special section of the manager called “Checkup” you can check passwords. Chrome will notify you if your passwords include:
- Too simple ones, i.e., easily guessable. For example –
password123,Julia9191, etc. - Identical passwords for different sites. This is bad practice. It’s best to generate random passwords.
- Compromised passwords. These are passwords that are publicly available. This refers to a combination of password, login (email), and website address.
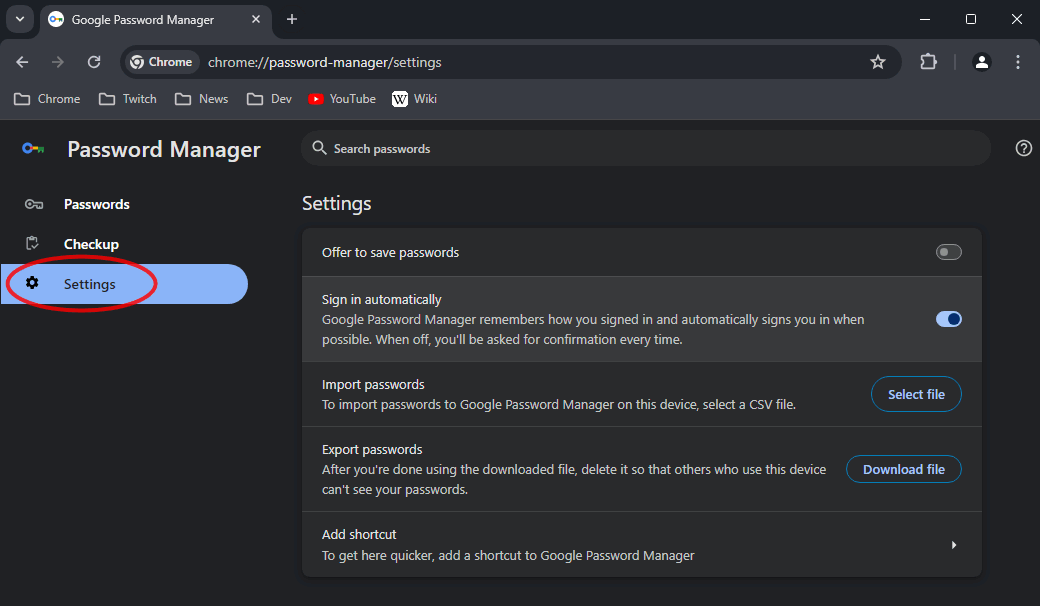
Settings
There are a few settings options for the password manager, besides the export and import functions. You can access it in one of 2 ways:
- via the link chrome://password-manager/settings
- open the passwords manager → in the left menu, select “Settings”
How to Disable
You cannot completely turn off the password manager, but you can disable the offer to save passwords when logging in/registering anywhere. This is done in 2 steps:
- open the password manager settings
- switch the “Offer to save passwords” toggle to the off state
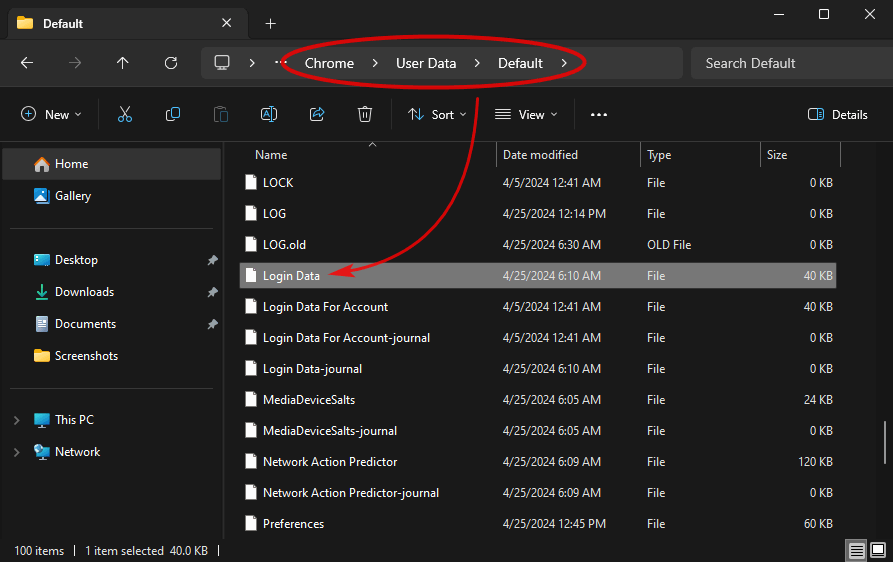
Where Passwords are Stored on Disk
Chrome stores your password database in a file:
- c:\Users\%USERNAME%\AppData\Local\Google\Chrome\User Data\Default\
Login Data, where %USERNAME% is your Windows username
Features:
Login Datais inSQLite3format- the
Defaultfolder in this example indicates that the default profile is being used - the
AppDatafolder is hidden by default in Windows
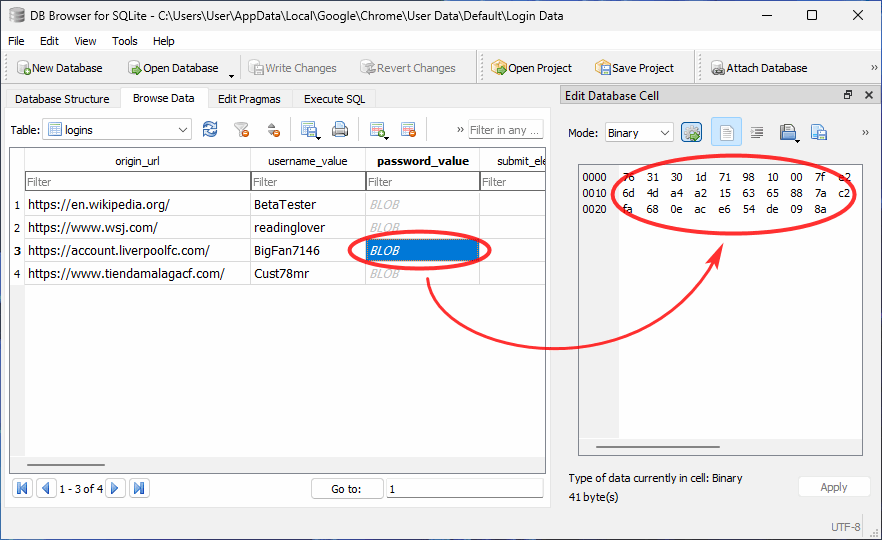
The password file can be opened in a special editor, but the passwords are not stored here in plain text. They are encrypted using the Windows API function CryptProtectData. The protection is tied to the specific device and the current user name. In simpler terms, if someone steals this file or tries to insert it into their browser copy, nothing will work.
Transferring Passwords
To transfer the Chrome password database to another computer or simply to create a backup, you can use 2 methods:
- create a special file in
CSVformat, which will be discussed further in the section - use the synchronization
Export
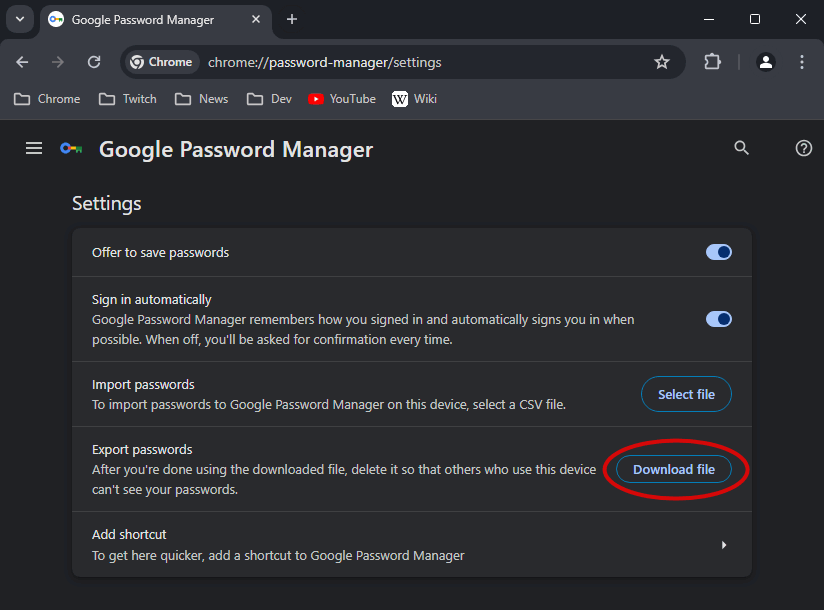
The password export function in Chrome will be available if there is at least one entry, which is quite logical. The brief algorithm of actions is as follows:
- Open the password manager settings
- Find the subheading “Export passwords”, click the “Download file” button
- By default, the application will suggest creating a backup file named
Chrome Passwords.csv
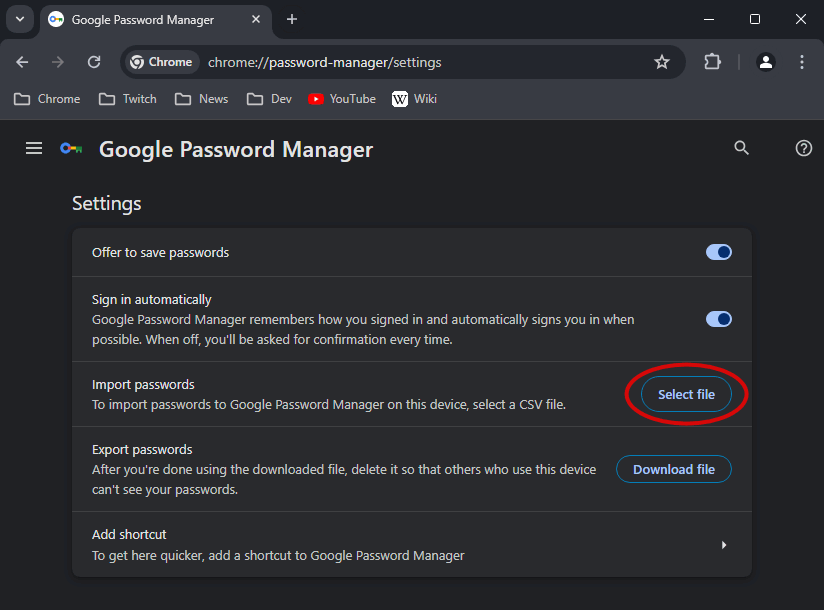
Import
As you might guess, for import, we need a CSV format file created earlier as a result of export. The process of importing passwords into Chrome looks like this:
- Go to the password manager settings
- Find the subheading “Import passwords”, click the “Select file” button
- Select the previously created password backup file on your disk. By default, it is named
Chrome Passwords.csv
noticeTo import passwords from another local browser (Firefox, Opera, etc.), use the “Import bookmarks and settings” module
Restoring Passwords
As mentioned earlier in the article, the local Chrome password database is stored in a special file and is duplicated on a cloud server with active synchronization. Therefore, there is only one way to restore passwords in Google Chrome:
- If at the time of any force majeure circumstances (disk failure, OS failure, etc.), synchronization was enabled, then it is sufficient to activate it again in a new browser copy under the same Google account. The data will be loaded from the server.